Course Objectives
Students will use a range of art making processes to communicate personal ideas. Students will learn how to use different art techniques and tools in the style of historical and current practices. Curriculum is organized based on the Elements of Art.
Assignments will be graded on satisfactory attempt to master techniques and completion of assignment, positive classroom behavior and responsibility for materials, and genuine effort towards the project goals.
Projects graded on:
- Daily classroom behavior, cleaning up, and following our Social Contract
- Effort towards project, neatness, and care towards doing your best
- Following project instructions and timely completion
Classroom Expectations
- Keep our classroom organized and safe by cleaning up materials everyday.
- Respect other students’ materials, workspace, and projects.
- Help each other brainstorm, create, and clean up projects.
- Students are dismissed by Mrs. Fio, not the bell, dependent on table group daily cleanliness and behavior.
- Respect other students’ materials, workspace, and projects.
- Help each other brainstorm, create, and clean up projects.
- Students are dismissed by Mrs. Fio, not the bell, dependent on table group daily cleanliness and behavior.
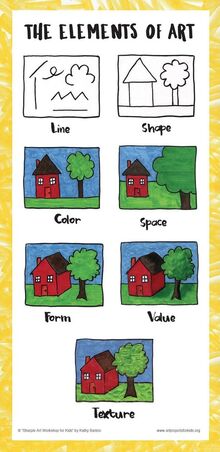
Elements of Art & Principles of Design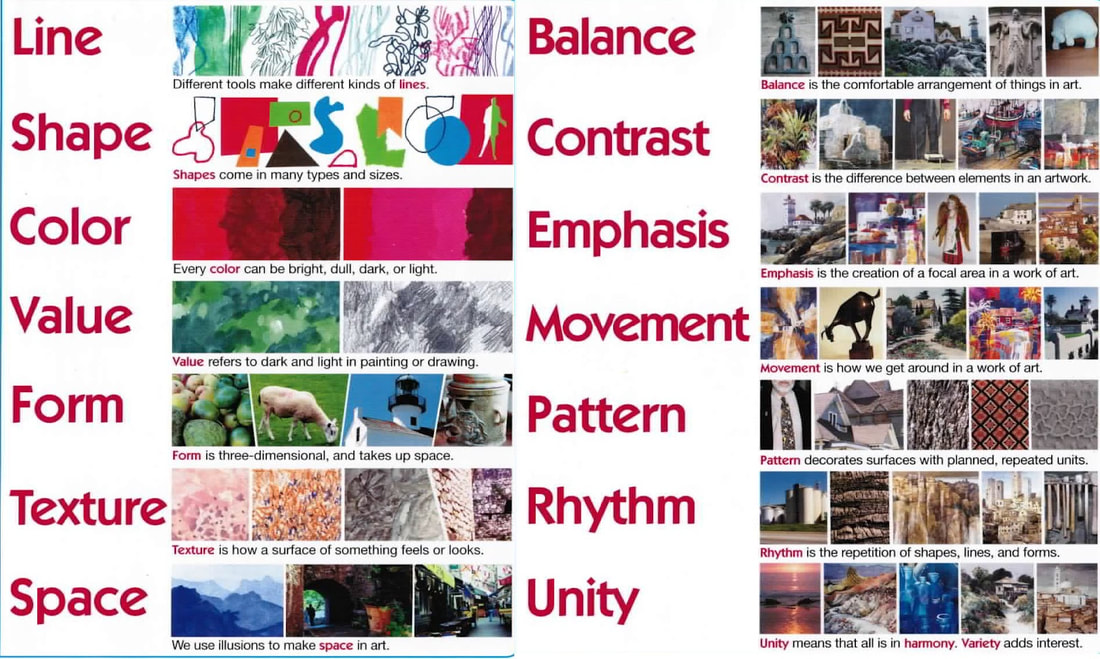
"Composition"
The placement of objects in an artwork. |
|
QUARTER 2
cross stitch ornament
First practice cross stitch. Get a canvas, yarn needle, and piece of yarn that is about twelve inches long.
|
|
Trace your circle plastic canvas on the graph paper.
Plan out a design in pencil and color pencil. The plastic canvas MUST be completely filled - no plastic should be showing in the end. All knots should be on the back side of the canvas. Wrap edges of canvas as shown below. 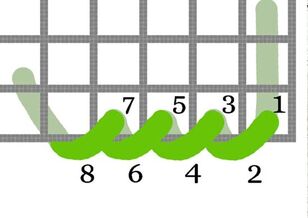
|
holiday votive holders

|

|
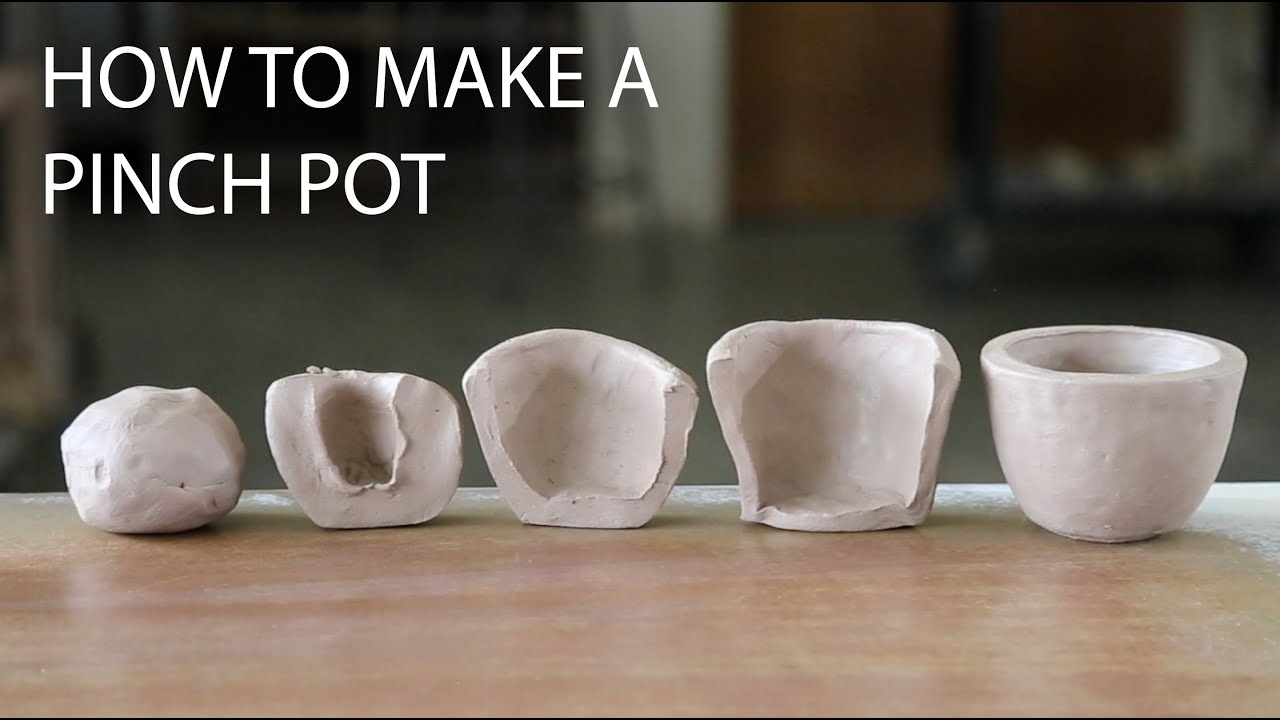
do not put clay in the sink
keep clay on boards

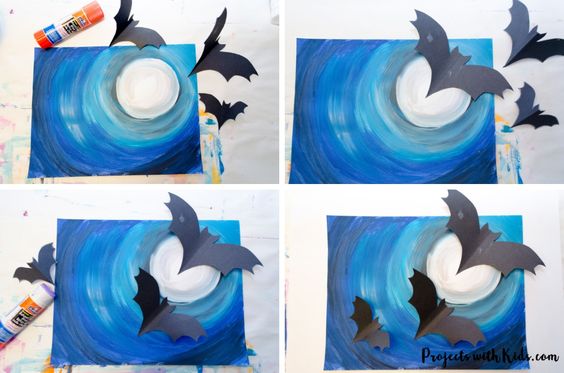
Gradient Halloween Moon

|
Materials:
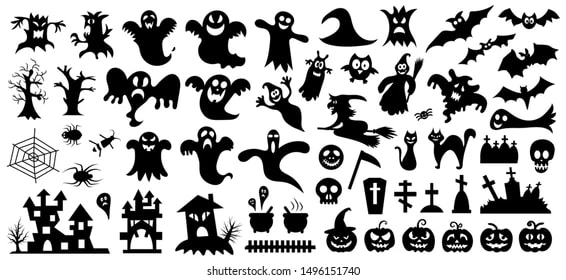
Tempera paint, paint set up, 9x12" paper, black construction paper, scissors, glue stick Steps: 1. Make a practice value scale on copy paper with your chosen color. 2. The moon should be paper white, and paint the sky to go from light to dark around the moon. 3. The farthest corner edges can be pure black. 4. Make an effort to make the shading smooth between colors. 5. When dry, cut out Halloween-themed silhouettes and glue on. 
|
|

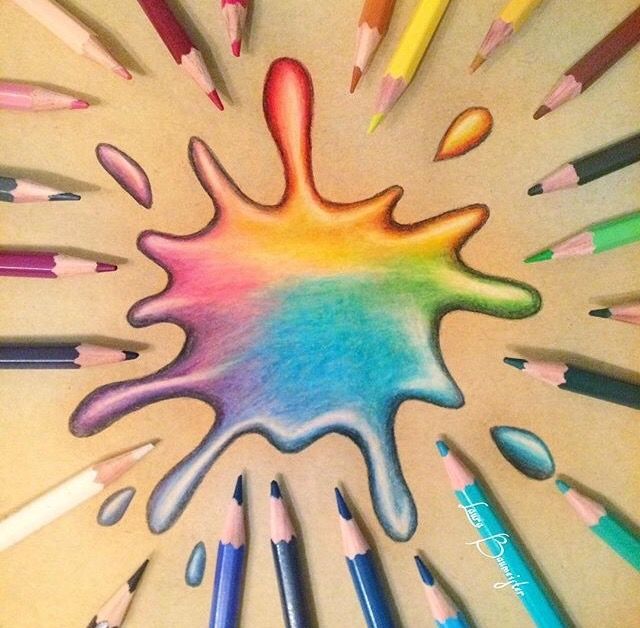
Colored Pencil splatter
|
|
Materials:
Colored Pencil, Pencil, 9x12" paper Steps 1. Follow the video techniques. Pause the video as needed. 2. Complete three (different colors) paint splatters on your paper. |
|

|
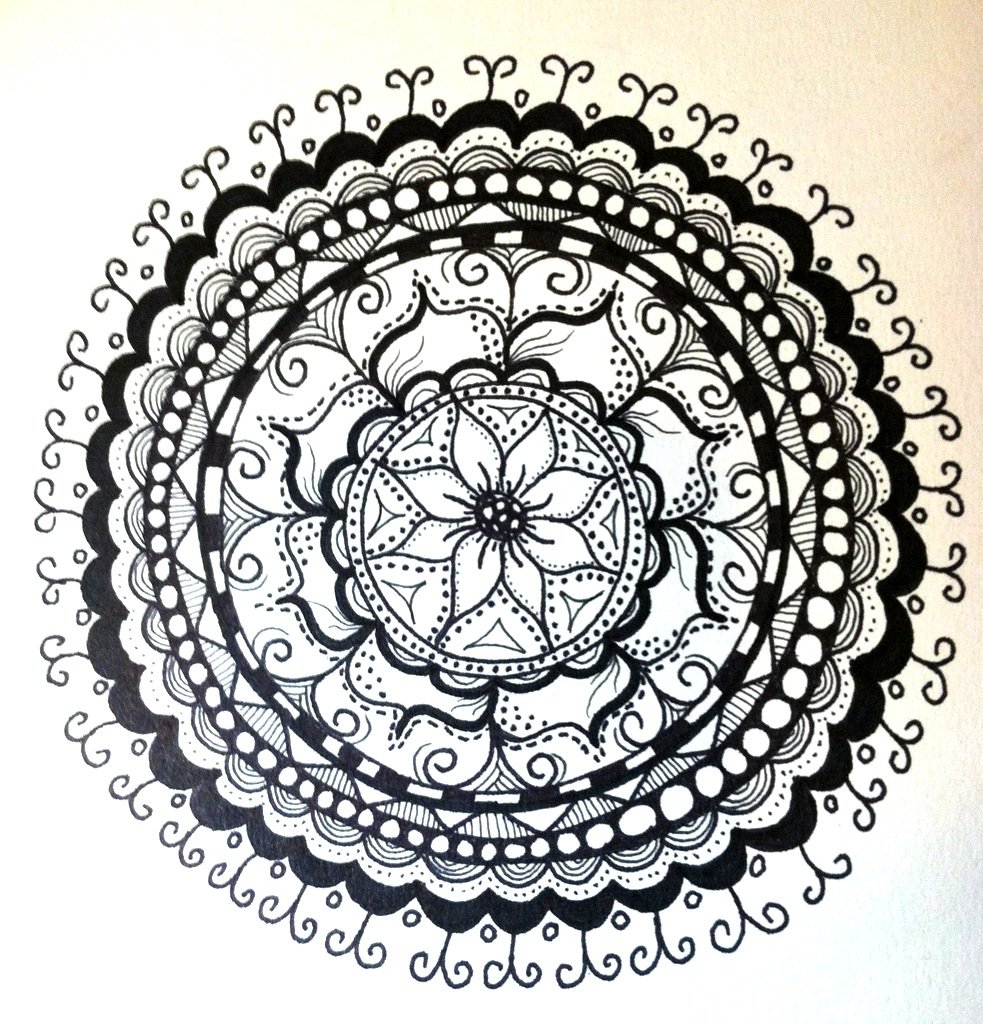
symmetry skulls


Zentangle Examples:
|
Materials:
Pencil, 9x12" watercolor paper, sharpie Steps: 1. Choose a skull template (located in sub folder), trace in the center of the paper with pencil 2. Draw Zentangle decorations around one side of the skull. You can draw the basic outlines, save small detail and filling in for later steps. 3. Fold the paper in half and trace the other side using the light table. 4. Add abstract watercolor background. It must be symmetrical. You can paint one side and fold the paper, or free hand the symmetry. 5. When dry, trace pencil with sharpie. Fill in some areas and add thicker lines to create contrast. 
|
|

|
|
color wheel collage
|
Find 12 "slices" of color from magazines to create a collage color wheel.
Try your best to find pieces that have just one main color. Use glue sticks! 20 Points 
|

|
TV sculptures
The back wall of the TV is NOT your "background" layer
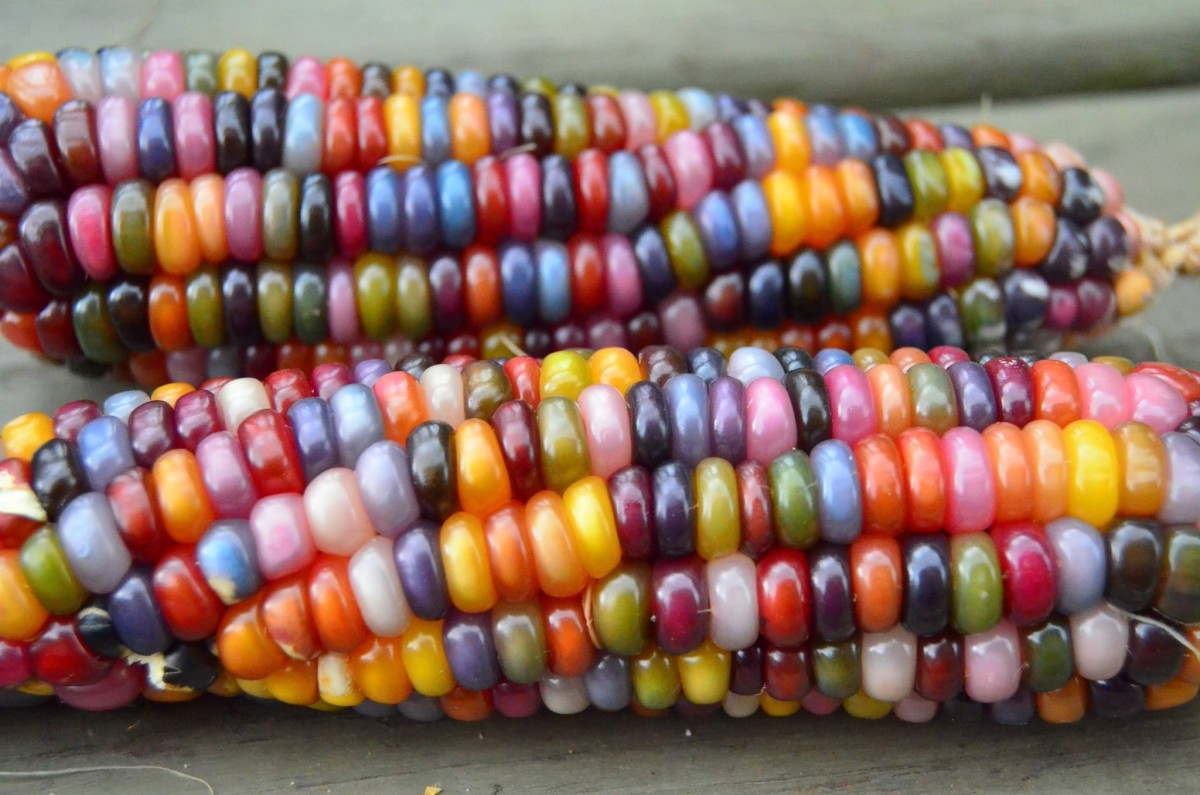
Jewel corn watercolor
|
Materials
Pencil, 12x18" watercolor paper, watercolor set up, acrylic paint, sharpie Steps 1. Start with pencil. Draw light. Fill the paper with rows of corn kernels. The kernels should have some variation, slightly different shapes. But overall rounded rectangles. They should be close together, most touching. 2. Watercolor the kernels. Move around the paper so that the watercolor doesn't run into each other. Make an attempt to leave a small area in each kernel bright. 3. When dry, fill in the spaces between the kernels with sharpie. 4. Add small white acrylic highlights for the reflections on the kernels. Highlights should be in similar spots on the kernels. 5. Glue onto a 12x18" construction paper and trim for a border. 

|


|


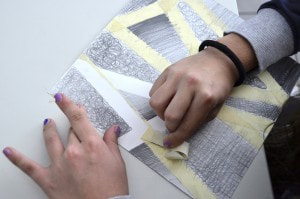
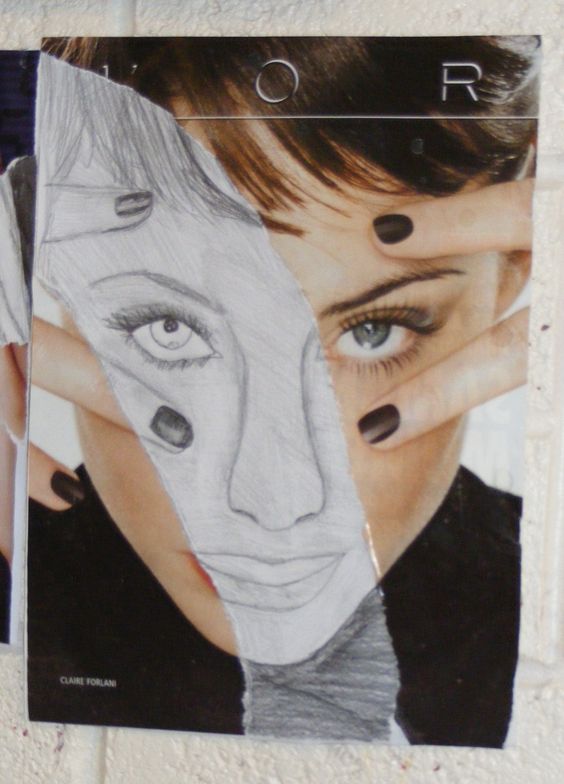
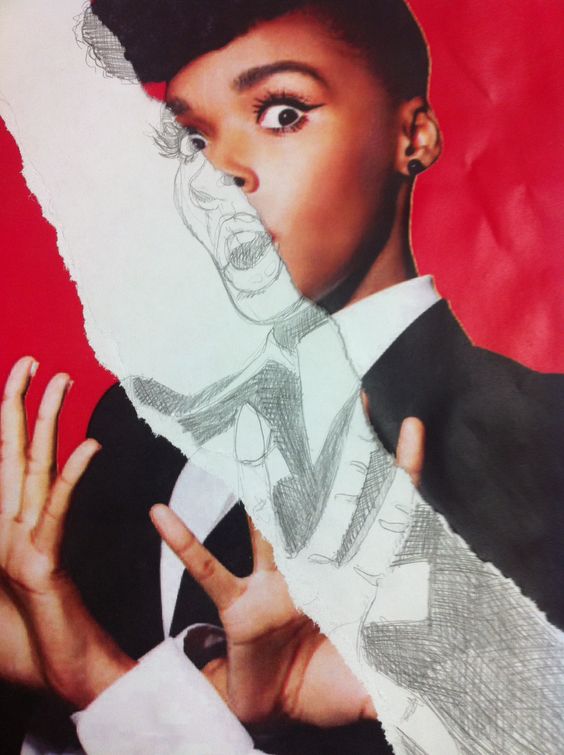
Fragmented portraits
Steps:
1. Find a face in a magazine that is full page size. Magazines are located near the whiteboard.
2. Plan what you will do before you cut up the face. Cut into 5 - 6 pieces.
3. Choose a 9x12" construction paper background.
4. Your collage must have all the elements listed below. Collect materials before gluing to your image.
5. Overall artwork should be very full and detailed. Get creative!! You may add any kind of decoration, style, and other random materials.
|
|
Your image must have:
|
gemstone 3d colored pencil
|
Materials
9x12" paper, pencil, colored pencil, scissors Steps: 1. Draw a gem stone like the example. Draw big. Use a ruler for straight lines. 2. Choose three or four color pencils that make a highlight, mid, mid-dark, and dark hues. 3. Choose a section on the top or bottom to be the brightest highlight. Diagonal opposite from that space will be the darkest shadow. 4. Follow the video techniques to blend the color pencil to create smooth shading. Follow the guide for where to place the highlights, mid, and dark hues. 5. The overall gem should have a built-up colored pencil waxy texture. 6. Cut out the gem when finished. 
|

|
Fantasy Map
|
|
Materials:
12x18" watercolor paper, watercolor, sharpie, pencil, colored pencil Begin by imagining a unique fictional world with a theme (i.e. cotton candy world, calico cat world, Harry Styles world, basketball world, etc.). Make a list of landmark ideas that fit in your themed world (i.e.: for calico cat world, I would have Purr City Fish Bones Island, and Catnip Forest, etc.) Draw a practice sketch of at least two land masses and practice drawing the map icons. See examples. |
Cartography Icon Examples


|

|
|
Steps:
1. Begin by gently ripping the edges of the 12x18" paper. Do not take off too much! 2. Lightly begin working on map in pencil. Draw light! Take your time! Be creative! Your map must have all the elements in the list ---> 3. Watercolor paint the land and water. Use brown or yellow for the land. Use very watery colors so that the map has a more antique look. Add a little darker watercolor in some edges to give it an even more realistic antique look. Optional: add a little darker edges around the land for some subtle shading. 4. When dry, go over all pencil detail in sharpie 5. Add some colored pencil shading and colored in areas. If you want to keep an antique look, you can stick with neutral colors (browns, grays, etc.). |
Your Map Must Have:
|
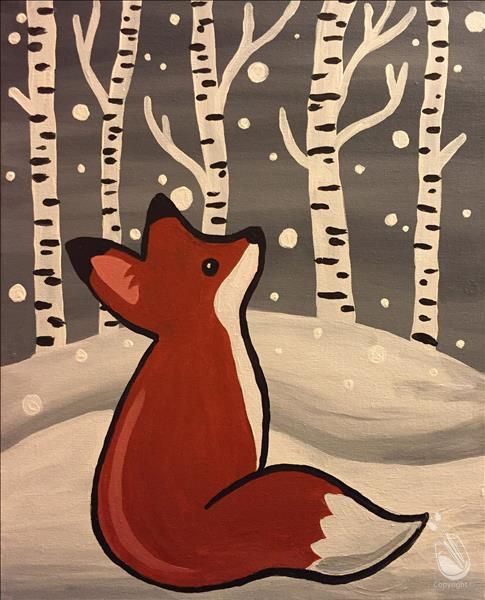
Fox in winter painting
Emoji Pillow

Quarter 4
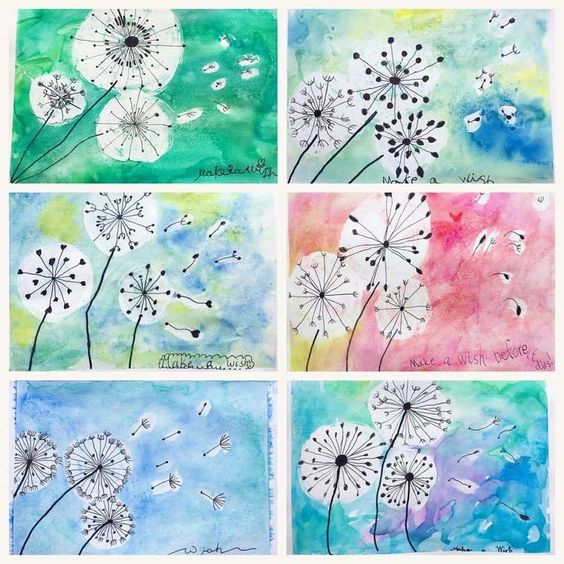
Dandelions in the wind

|
|
Picasso Brain Challenge

|

|
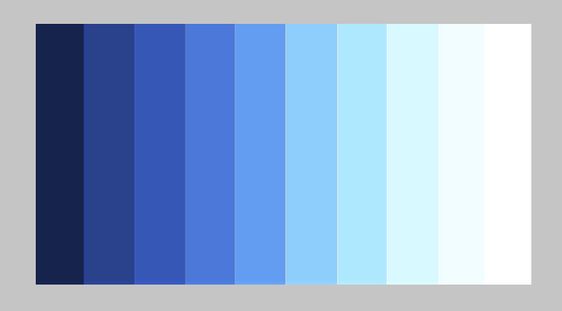
value word


|

|
|
|

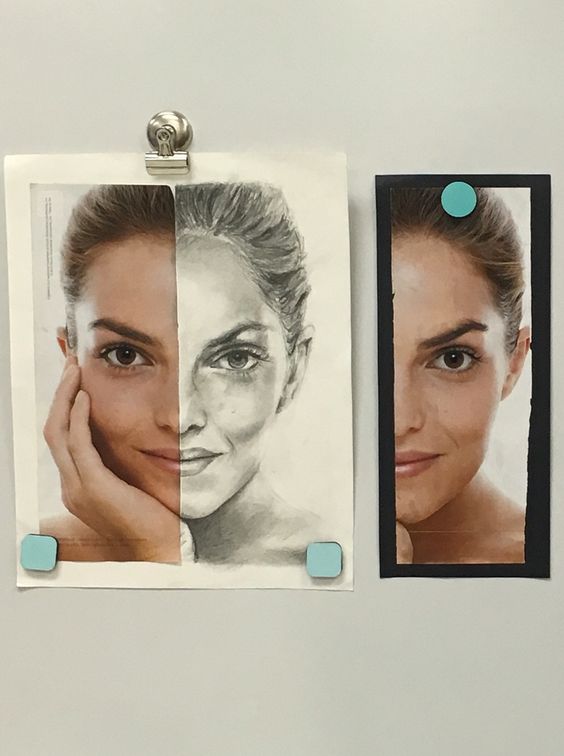
magazine half drawing
|
|
|
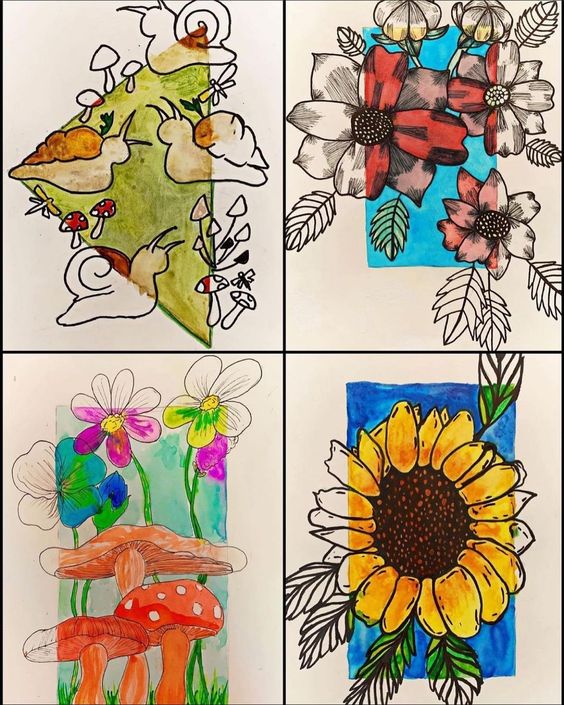
bubble hydrangeas


|


|
Primary Color Mixing collage

|

|
|


|
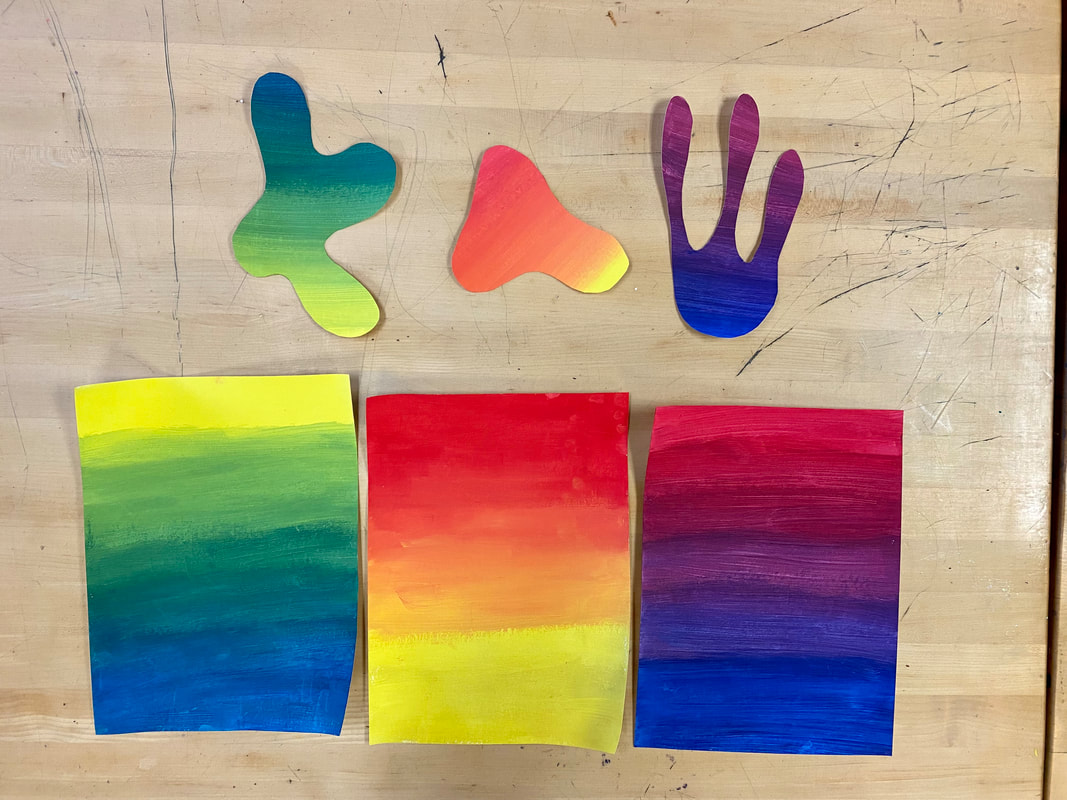
jen stark cut outs
|
|

|

|

|

|
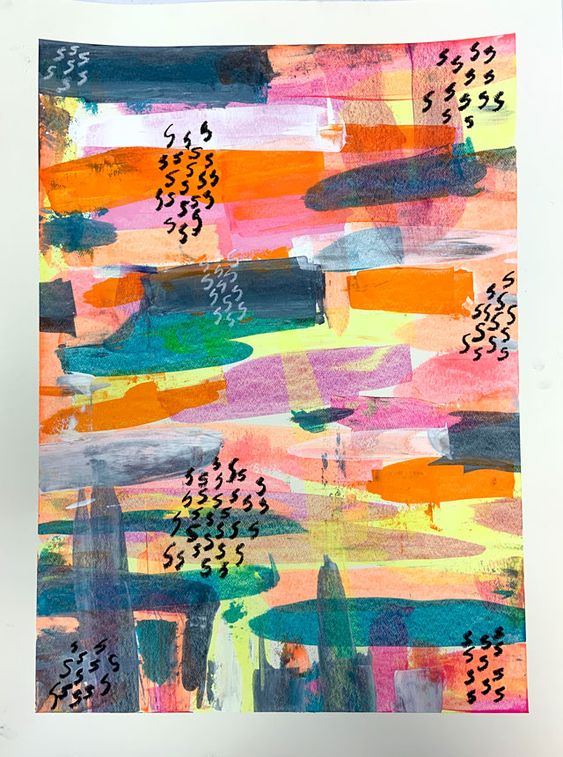
Abstract Expressionism
Large scale abstract painting
|

|

|
value painting

|

|

|
|
Beyond the border color drawing
|
Choose a real animal or plant.
Find one or two reference images. Start in pencil. Finish in either colored pencil or marker. |
tic-tac-toe clay boards
|
|
Sketch first
Overall must have a theme Pieces must be identical (but two distinct teams) Board edges must be raised 5 pieces each team (10 total) |
ALL ABOUT GLAZE
|
|

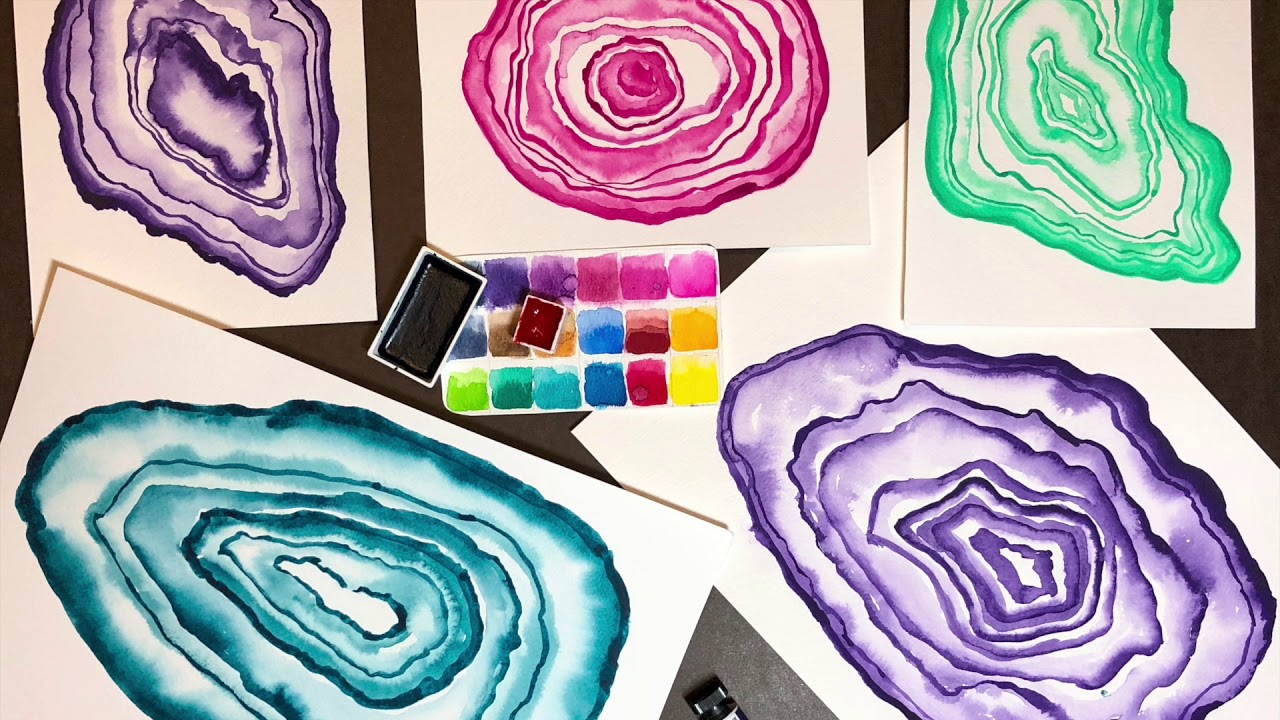
Geode Watercolor
|

|

|

|
Notan
|
|
|
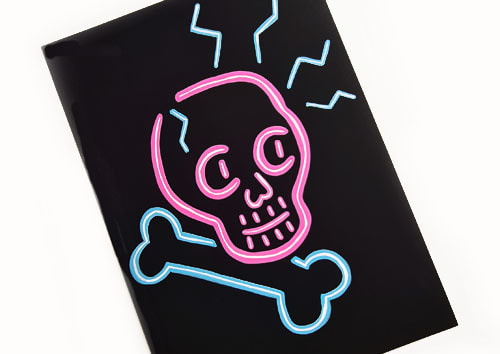
Faux Neon Sign Painting

|

|

|

|
Optical Illusion Weaving
|

|
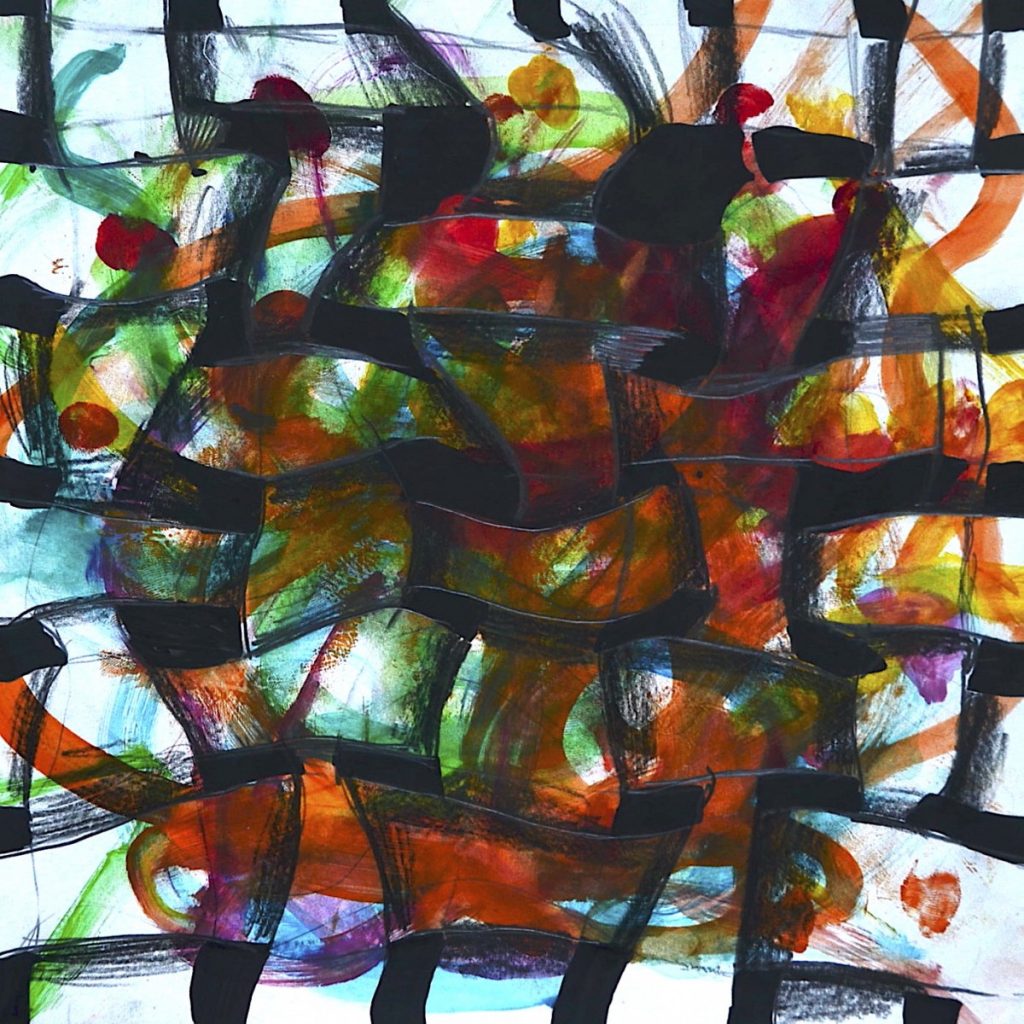
|
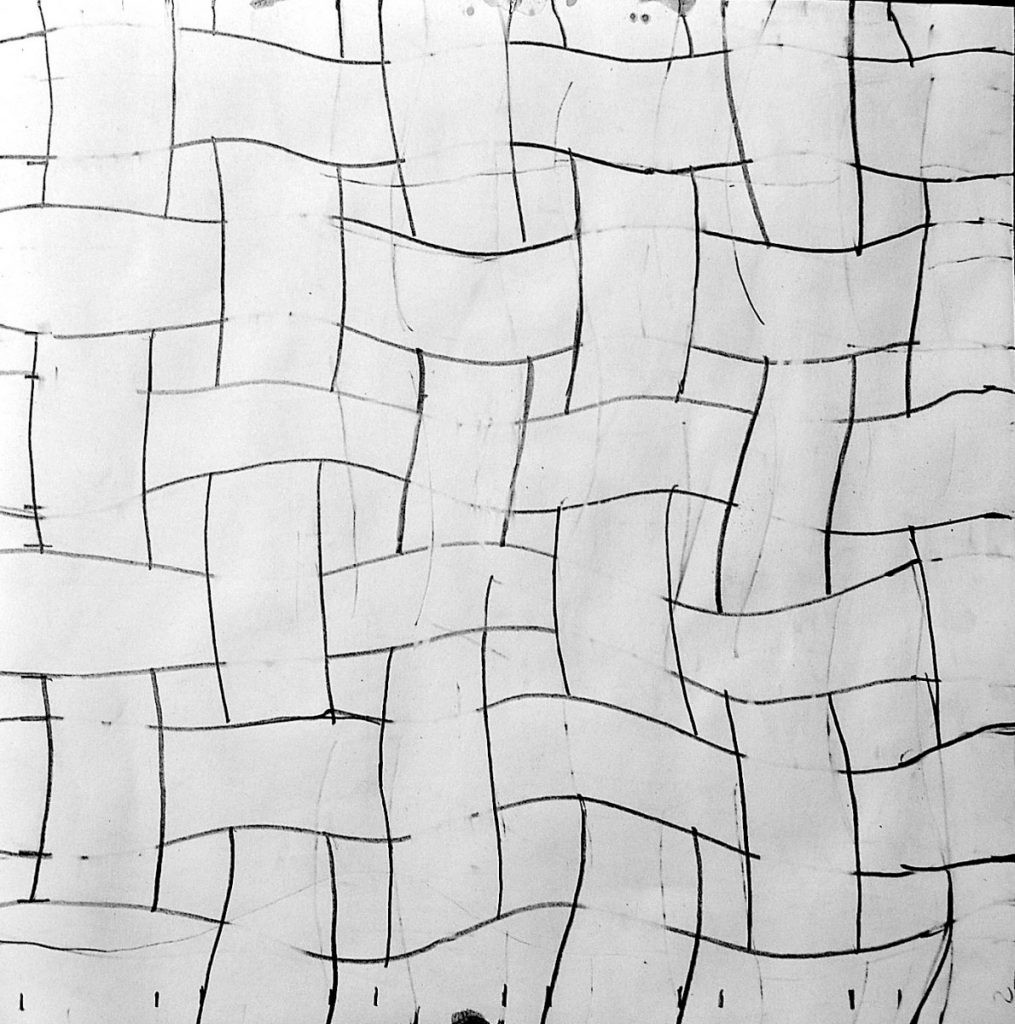
|
|
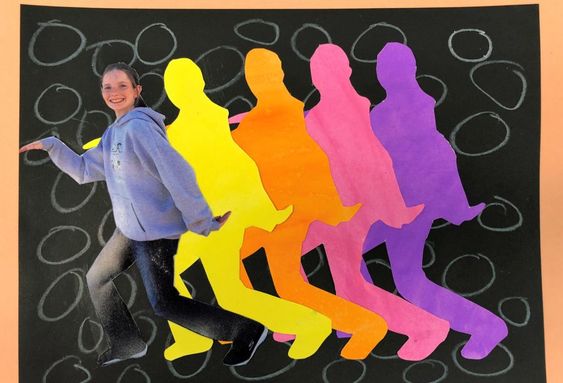
Magazine collage silhouette

|

|
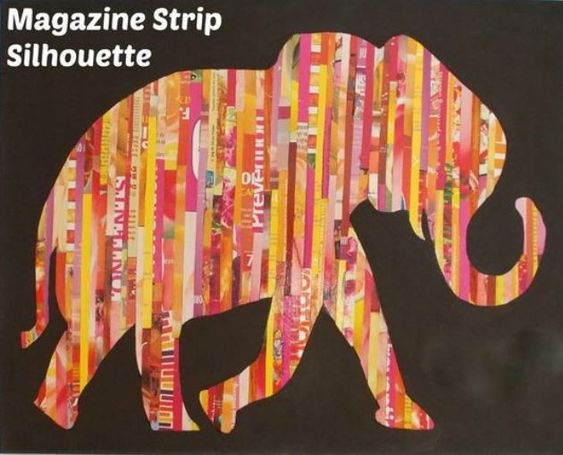
|

|

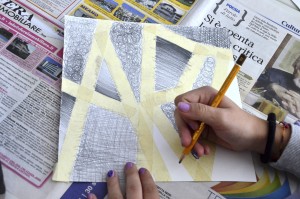
Letter zentangle - Negative Space

|

|